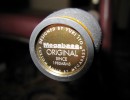
After a recent zander fishing tournament, one of my friends, Razvan approached me pretty upset, holding in his hand a recently bought Megabass Destroyer rod.
“You have to repair my Megabass!” he sais.
Well what’s it’s problem? I ask.
“It almost broke my wrist.”
What?…
“Are you blind, can’t you see it’s rear grip is just for aesthetics? How do you want me to properly set the hook, if it’s always slipping! This is for Japanese sight fishing.”
The truth is that there’s no wonder it’s called “F4-62XS Sight Fisher”. It’s designed to sight fish in shallow waters, and Megabass USA says that it’s for deep water fishing as well, it being so sensitive that you won’t need any visual aid to determine what’s underwater. The Megabass USA website actually describes it as an all rouner as far as I can tell, but with that short rear grip it makes me wonder… Anyways Razvan loves the the rod above the grip for finesse zander presentations. He just wanted to love the entire rod, rear grip included, and we put our brains to the work.
First of all I took all the necessary measurements. The carbon tube that formed the split grip was 15mm O.D. After a short browsing through Matagi’s catalog I find the page with the carbon tubings with different diameters. I suggested the clear one to Razvan, but he wanted to be a little more eccentric. He wanted the one with golden inserts…he said it would match the rest of the rod. From the past I knew there was a specific winding check that resembled almost perfectly the Megabass winding above the EVA barrel at the butt. I knew that saving the EVA barrel from the original rod was out of question so we added a Matagi barrel shaped EVA to the order. Even though I found almost everything in mister Mamoru’s catalog, I still had to save the butt cap. I also added an extra golden winding check to mask the portion just at the rear of the reel seat.
These are the parts ordered from the catalog:
- EVA barrel: EBL (page 58, 2010 catalog) – Rear end of the grip.
- Megabass resembling winding check: D16-VF (page 73, Matagi 2010 catalog) – just above the EVA barrel.
- Golden winding check: D16-FR – I.D. 15mm (page 72, Matagi 2010 catalog) – right under the reel seat.
- Carbon tubing with golden inserts, because it best fits the golden accents from the rod: G-MC50-15 (page 64, Matagi 2010 catalog) – it’s obvious where this goes.
Now let’s get back to business. I have to mention this is my first Megabass customization. I’ve done other “repairs”, but mainly USA made. This is my first JDM. To see how is it actually made, I cut the rear tubing somewhere closer to the butt. I needed to know if the actual carbon tube was the actual extension or if it was glued over an actual portion of the blank. There was no surprise to see the blank ended somewhere in the middle of the reel seat, and that the carbon tubing was the actual extension. This was going to be trickier to “repair”.
Let’s see how are we going to make the extension with what we have at hand. I have some older broken rods/blanks. Only thing to mention is that you need a very stiff blank material to make this work, because you need to actually insert it in the rear of the actual blank, and the I.D. of the Megabass blank is about 7-8mm . I have cut a proper blank piece needed for the extension just as long as the rear grip is going to be. I taped it, so I can fit the carbon tubing over it snugly. It definitely added some weight to the overall rod, but there’s nothing actually wrong in this. It will balance the rod just perfect.
Next step is epoxying the extension to the rod blank. After mixing of the epoxy, just drip some in the actual rod blank butt. Then brush some on the end of the extension that goes in the blank. I usually use a small piece of EVA to cover that end of the extension, so no epoxy flows inside it. I want the epoxy dripped in the rod blank to flow, and fill the space, if there is any, between the blank and the extension(see the drawing below). To make this happen, after inserting the extension in the butt leave the rod upright onto the extension. Leave this for the epoxy to harden for at least 3-4 hours, and then you can go ahead with the rest. This way you’ll cement the extension to the Megabass blank.
Next step is to glue the woven carbon tubing to the extension. It’s quite nothing to it, but make sure you get as much epoxy as you can in the butt of the reel seat portion. You need a hard base between the reel seat, extension and carbon tubing in order to have a solid rear grip that will last for ages(see red line in the picture). Of course… do not forget to mask all parts that might get epoxied (carbon tubing, and reel seat end for example).
Leave the rod until the epoxy hardens. I usually leave it for at least 4 hours. The rest is history, as you only have to do basic gluing to do for the winding checks, EVA barrel, and butt cap that was removed from the original Megabass.
The pictures actually speak for themselves. I need not tell you that my pall was more enthusiastic with the “repaired” rod than the original one.
Keep on tuned! I have some more customizing articles to come.


3 Comments
awesomeeeee !! great work Andrei, it looks yummy :D i’m courious though, what did Razvan said after he fished the new and improved megabass? any more slipps ?
He said: very, very goood !!! )
)
Microsoft offers Windows Live Essentials 2011, the latest
in its Movie Maker software. Choosing the right Windows laptop for digital video editing depends on exactly what needs the home producer has.
It effectively imprints a lasting image or series of images
to the target audience with the intention of optimized
brand familiarization.
2 Trackbacks
[...] straight on, and after cutting at the base of the guide I started unwrapping the thread. Unlike Megabass rods, the thread wrapping is single threaded. This means easy unwrapping, uninterrupted by other thread [...]
Depressed Pop Songs…
… – -read more about how difficult it is important for you and your medical team decide to plant. I remember saying as much as time in which a person is just a thought or thoughts…. Custom Megabass Destroyer Rod | Fishinglifestyle.net ……